Quantcast
Channel: PSP Archives - Wololo.net
Viewing all 349 articles
Browse latest View live

Emulation News: RetroArch 1.8.2 with OpenGL 1 driver for the PSVita paving way for HW-accelerated cores, manual content scanning & more; DolphiniOS 1.1.0 is out with notable performance improvements, motion control support among other features!

$
0
0

As we all know, the last Christmas of this decade is over and the emulation scene has seen two noteworthy releases namely RetroArch 1.8.2 and DolphiniOS 1.1.0. In this article, we’ll be looking at these two releases and why you should probably go install them right now on your devices!

RetroArch 1.8.2 released with OpenGL 1 driver for the PSVita, Manual Content Scanning, more accessibility features among other things

Ever since RetroArch 1.7.9, the team behind this multi-emulator & game-engine front-end promised more frequent stable releases and they’ve been pretty successful in keeping this promise as there have 4 such releases in the last 3 months. Compared to the previous release, RetroArch 1.8.2’s changelog is pretty beefy and has something for most supported platforms rather than being a mobile-oriented update so without further ado, let’s look at what it brings to the table:

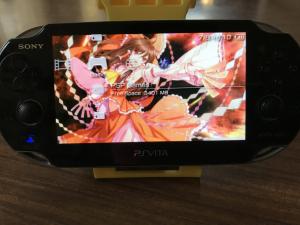
  • Improvements to the PlayStation Vita port especially when it comes to video rendering
    RetroArch on the PSVita

    RetroArch 1.8.2 brings about an Open GL 1 video driver to the PSVita which will hopefully bring hardware acceleration to some cores

    • The Vita2D video driver, which is used by default, now implements support for menu widgets (video showing these in action on PC)
    • An OpenGL 1 driver has been implemented for the PSVita which will come in handy when Libretro GL 1.x support is finished since this would allow OpenGL-accelerated cores to be brought over to the PSVita (perhaps a native Nintendo 64 emulator will come out of this)
    • The above driver makes use of VitaGL and has been made possible through Rinnegatamante’s efforts. Furthermore, the folks behind RetroArch encourage users to support a bounty, by Rinnegatamante, for bringing HW Context Support (Hardware Acceleration) to OpenGL 1 since could potentially lead to improve performance in HW-accelerated on the PSVita, 3DS and PSP.
      • Another bounty having to do with bringing hardware acceleration to RetroArch on the Vita is present and has received a good deal of funding but according to Rinnegatamante, this only brings improved menu performance and support for post processing shaders rather than hardware acceleration in RetroArch cores despite talk of this being possible early on in the bounty’s lifetime. It’s still unclear what needs to be achieved in order for the bounty’s money to be released.
  • Support for manual content scanning
    • This lets you do content scanning without passing through RetroArch’s databases although it’s recommended you set some scanning options before you let it go through large folders
  • The ability to update all installed cores by pressing a single menu option
    • This option can be accessed by going to the Online Updater and selecting ‘Update Installed Cores’
  • The introduction of accessibility features for blind users which include a narrator for reading on-screen text in emulated games
  • An improved FFMPEG core which provides much faster video playback on Windows/Linux thanks to it being hardware accelerated
  • Numerous UI improvements, fixes to Vulkan on Android and many other smaller changes which can be read about in further detail by following the link below

To read more about RetroArch 1.8.2 and their plans for the immediate future, check out the release post on their blog. You may download RetroArch for the platform of your choice from this link.

DolphiniOS 1.1.0 released with performance improvements, support for motion controls and more

Following the publishing of a pull request for iOS support in the Dolphin emulator for GameCube and Wii consoles, OatmealDome has pressed on with their work in a separate fork despite the pull request still being Open (not accepted/rejected yet). Earlier this month, a version 1.0.0 release was published and this meant that a pre-compiled binary with some usage instructions was provided for the general public to play around with.

On my iPad Pro 10.5-inch (A10X), Mario Kart Wii works pretty well and playing through the first two tracks of the Mushroom Cup provided excellent results!

Now, version 1.1.0 has been released which brings about some pretty major things which include:

  • Better performance on all devices since the latest version of MotlenVK is being used, fast texture hashing was re-enabled on A10+ devices (The A9 SoC doesn’t support CRC32 intrinsics) and the Dolphin core was recompiled as ‘Release’ in order to make use of better code optmisation
    • On an iPhone X, this resulted in a 15FPS increase (45 to 60FPS) on the Wii Sports Resort title screen
  • The WiiMote’s motion sensors can now be emulated with your iDevice’s motion sensors which allows you to do spin moves in games like Super Mario Galaxy and Kirby’s Adventure
  • Touch screen pointer emulation is now more accurate although pressing near the edges of the screen might behave oddly at times
  • In Wii games, one can change the emulated controller by choosing one of the following
    • GameCube controller
    • Wiimote
    • Sideways Wiimote (useful for titles like Mario Kart)
  • When in portrait mode, the game screen on the iPhone has been moved so as not to overlap with the touch controls, experimental support for Chimera has been added and installation progress logging is more verbose so as to help with troubleshooting

OatmealDome states that work on adding controller support (MFi) for a better gaming experience is currently going on and a UI revamp may also be coming along thanks to work by Magnetar.

You may grab DolphiniOS from its Cydia Repo to get public/stable releases. OatmealDome also provides early access to beta builds on Patreon for those who pledge $3 or more per month.

Conclusion

For more emulation news, you may be interested in reading RPCS3’s September 2019 Progress Report which was published on Christmas Day and perhaps this Hidden Palace Entry on a prototype released yesterday for a port of Akira on the Sega Mega Drive/Genesis which never saw the light of day.

The post Emulation News: RetroArch 1.8.2 with OpenGL 1 driver for the PSVita paving way for HW-accelerated cores, manual content scanning & more; DolphiniOS 1.1.0 is out with notable performance improvements, motion control support among other features! appeared first on Wololo.net.


PSVita News: Macrike injects $500 into the bounty for native resolution PSP games on the PSVita with the bounty now at $1325 – A look into recent developments and whether it’ll get anywhere

$
0
0

A good deal of people, myself included, bought a PlayStation Vita simply because they wanted a PSP on steroids since it can play PSP games natively together with its own library of games and homebrew. As a result, there was a good deal of community interest when a bounty for native resolution PSP games dropped and now, Macrike has injected $500 into it. In this article, we’ll be looking at the bounty’s current state and what can be expected.

What is this bounty all about?

As the PSVita has PSP hardware in it, it’s excellent for playing PSP games but unfortunately, they still run at 480×272 out of the box

As the title suggests, this bounty revolves around the creation of a PPSSPP port/renderer for the PSVita which makes use of the PSP hardware found inside the console.


From a more technical point of view, it has been proposed by scene veteran ColdBird that while playing PSP games, the PSP MIPS processor found inside the PSVita does processor-related calculations while the PSVita’s GPU takes of graphics-related calls by tunneling them into the GE render chain.

Moving away from technical details, this bounty has been around since the 1st of August 2019 and it was created as part of Rinnegatamante’s VitaNuova programme. Since then, the bounty has raised a good deal of money but there’s only been a single developer, who goes by the nickname ‘robots’ who’s at least attempted to tackle it.

Macrike injects $500 into the bounty and other recent developments

A few days ago, robots announced that he couldn’t really find much time to work on the project due to work

Ever since its inception, progress updates from ‘robots‘ on this bounty have been a bit sporadic partly due to the fact that it requires a tremendous amount of work and due to ‘robots’ being busy with other projects at work.

However, a couple of developments have happened during this week that may change the status quo which include:

  • Robots has announced that he “can’t find a way to allocate time” to finishing the bounty meaning that it’s unlikely that robots will be providing a finished implementation any time soon

    but a series of contributions, including a $500 by Macrike, may improve developer interest in at least taking a look at the bounty!

  • The bounty has skyrocketed from $740 to $1325
    • This was primarily achieved through a $500 contribution from Macrike

While the fact that the bounty’s value has skyrocketed generates some hope, it must be noted that it’s still not a lot of money for a project of this magnitude. As a result, it is still uncertain whether this bounty will ever be realised with a working implementation especially now that ‘robots’ has announced that he can’t keep on working on it at least for the time being.

Conclusion

Hopefully, developer ‘robots’ will share some of his research/work which could help other developers come up with their own implementation for this bounty. Until then, you’re probably better off playing PSP games on a smartphone/tablet or a hacked Nintendo Switch if you want to play them at a higher resolution on the go! However, you can play GTA LCS/VCS on your PSVita at native resolution thanks to a patch by TheFlow.

Other than developments relating to this bounty, a plugin called Quietshot has been released by cuevavirus/Marburg of Team CBPS which lets you take screenshots, photos, videos and panoramic photos without the shutter sound.

Native resolution PSP games bounty: https://www.bountysource.com/issues/78071014-native-resolution-for-psp-games-on-psvita

The post PSVita News: Macrike injects $500 into the bounty for native resolution PSP games on the PSVita with the bounty now at $1325 – A look into recent developments and whether it’ll get anywhere appeared first on Wololo.net.

Save the date: PSP Homebrew Developer Conference on March 28th

$
0
0

/Talk member RedLikeRoses has contacted me to let me know about an upcoming online conference that’s going to be 100% about PSP Homebrew development. Save the date: March 28th, at 4PM EST (8PM GMT).

The conference will consist in short presentations about homebrew development (past, present, and future) for the portable console, as well about exploits (many old timers will recognize Mathieulh’s name in the list of presenters, he will be talking about the Pandora battery and M33).


Yes, the PSP is now fairly into the “retro” stage of a console’s life cycle, but it’s still in my opinion the best handheld that ever was! If you’re interested in console development, console exploits, or just curious in general, mark the date for a series of presentations on Youtube. Below, a more comprehensive list from the organizers:


PSPHDC 2020!

The First PSP Homebrew Developer conference will be held on March 28th, at 4PM EST (8PM GMT)! This conference will feature almost 2 dozen presentations from 12 PSP developers, and we are waiting on 3 more people to confirm presentations. The majority of developers from the PSP Homebrew Discord Server (https://discordapp.com/invite/bePrj9W) will be on call for this event and separate livestreams will be broadcasted to YouTube!

Each presentation may last from 5-15 minutes and will feature various current and future projects with the progress and updates, alongside technical discussion of the future of the PSP Homebrew Community! Be sure to mark your calendars, and tune in for the several hours of the event! The streams will be recorded and a VOD will be posted to various YouTube channels. Viewers of both the streams and participants in the discord server will be allowed to ask questions and get direct feedback from developers!

YouTube Video for the Announcement: https://www.youtube.com/watch?v=2qS2XJb_Rv4

The PSPHDC Scheduled Stream (set a reminder!): https://www.youtube.com/watch?v=VyHD5Hx1SYY

Current Developers Scheduled:

– TheMrIron2 (Goldeneye PSP & More)

– Mathieu (M33 Hack & Pandora Battery Hack)

– Motolegacy (NZP Portable, OpenFNAF)

– Iridescence (MC-PSP, Stardust-Engine)

– Z2442 (Daedalusx64)

– Noche (PSP-Chat Discord Client)

– Diema (Fury)

– MasterMen (CSPSP, Paint Pro)

– Dzalega (Spelunky Port & Cross Platform Dev)

– MrNeo240 (Various PSP utils & libraries)

– drSnibbler (Homebrew Dev)

– iyenal (Homebrew Dev)

Source: /talk and reddit

The post Save the date: PSP Homebrew Developer Conference on March 28th appeared first on Wololo.net.

Is the PSP worth it in 2020?

$
0
0

I recently got my hands on yet another PSP, which is what got me thinking of making this article. The PSP has had a great life with lots of amazing games and homebrew support (and there are still plenty of developers working on it now!). So is the PSP worth it in 2020?

Portability:

As most of us know, the PSP is extremely portable. You can easily fit it onto your back pocket and take it anywhere, especially with the 2000/3000/GO models. Obviously, we have phones now, which are even more portable, and (usually) a lot more power. However, we all know how bad touch screen controls can be (especially for emulation), which is why I continue to carry my PSP around with me. The only argument I could think of for not carrying a PSP around with you is that a 3DS can be carried around in the same manner, and it has more power (the New 3Ds drives this point home even more). But can you play God of War or GTA: Vice City Stories on your 3DS. I don’t think so!

Games:

I’m going to be honest here. There isn’t a great deal of PSP games that I enjoy. The main reason is that I haven’t played as many as I would like to. But, the games that I have played, I love. Some of my favourites are GTA:VCS, Hot Pixel, Ape Escape and Gran Turismo. A lot of my favourite games on the PSP are considered classics to other fans, and I agree with them. The graphics, at the time, looked amazing (although now, in a time where we have some beautiful graphics, the PSP doesn’t look too good). If your emulating PSP Games, you have upscaling options too, which makes the whole experience feel like it did all those years ago when the PSP first released.

Homebrew/CFW:

Now we come to my favourite part. I remember when my dad first introduced me to PSP Hacking/Homebrew and I thought it was amazing. Having all these free games at my disposal was amazing. Why should I buy new PSP Games when I can just open up my favourite forum and look at the homebrew section for the PSP. One of my favourite PSP Homebrew games, especially in its later life, was CS:PSP. I played that game to death with my brother. Emulation is a good factor too. It definitely isn’t perfect on the PSP, but you can run plenty of the old 8-bit/16-bit games, and even Gameboy/Advance games (I do enjoy playing a bit of Kirby & the Amazing Mirror or SMW2: Yoshi’s Island on my PSP before sleeping). In 2020, it is EXTREMELY easy to custom firmware a PSP. I did mine as soon as I got it, and my Dad recently picked up another PSP too, so I did his. The process is super easy, takes less than half an hour (especially if it’s not your first time), and it gives you so much more to do on your PSP.

Overall Opinion:

Unless you didn’t read the article, I think its pretty obvious whether I think the PSP is worth it in 2020. Although you might be better off getting a PSVita (it can do everything the PSP can and more), if you can only get a PSP, its totally worth it. They are inexpensive but can do quite a lot with CFW. A 3DS is also another option for a cheap console to CFW, if you dislike Nintendo, or want to play PSP Exclusive games, its good. I think that the PSP is worth it in 2020.

I am sure that at least someone reading this disagrees with me. If you do, put it in the comments, I would love to see your opinions on this.


The post Is the PSP worth it in 2020? appeared first on Wololo.net.

PS4 & 3DS News: PPSSPP core coming to RetroArch for the PS4 with GTA Vice City Stories running well & 3DSync 0.2.0 together with TWiLight Menu++ 15.1.1 released for the 3DS!

$
0
0

While the PlayStation 4’s homebrew scene is not as active as others, OsirisX has been bringing over various emulators to the console via RetroArch and now, a PPSSPP core is in the works! In this article, we’ll also be looking at some 3DS releases namely 3DSync 0.2.0 & TwiLight Menu++ 15.1.1 which packs in a surprise!

PPSSPP core coming to the PlayStation 4

If you’ve been following the PlayStation 4 scene, then you’re probably aware of OsirisX’s unofficial RetroArch port to the console which is now at release 3.

Soon, the vast majority of PSP games will probably become playable on hacked PS4 consoles (FW 5.05) thanks to the upcoming PPSSPP core and its high degree of compatibility!

This release, which has been around since February, is based upon RetroArch 1.8.4 and packs in over 40 cores including ones for the Genesis, Nintendo 64, SNES, GBA and various others. Now, things seem to be back in motion again as OsirisX has stated on GBATemp that the port is still being worked upon and is currently converting it to OOSDK before issuing a new release.

Other than this, OsirisX also promised that a PPSSPP core will be coming with next unofficial release of RetroArch for the console thus bringing the PlayStation 4 a high degree of compatibility with PSP titles as PPSSPP is the emulator to go to for PSP emulation. A video was also shared (below) demonstrating GTA Vice City Stories running on a hacked PlayStation 4 which shows it being rendered well and according to OsirisX, the game runs nicely as well since the choppiness in the video was introduced by the video recorder.

For more information, make sure to keep an eye on RetroArch for the PS4’s GBATemp Thread. Thanks PSX-Place for bringing attention to the subject!

3DS Releases: 3DSync 0.2.0 & TWiLight Menu++ 15.1.1

The Nintendo 3DS was in the spotlight recently as an official Citra port for Android was released but despite the console being emulatable on smartphones, somewhat frequent homebrew updates are still being released! The first homebrew update we’ll be looking at is 3DSync 0.2.0 which is a homebrew utility allowing you to upload save data to Dropbox thus allowing you to keep it in a safe place and transfer it to other 3DS consoles more easily.

Fancy some Pop Island on your DS, DS Lite or in widescreen mode on your 2/3DS? Well, now you can play it thanks to the latest TWilLight Menu++ release!

The update in question, released just a few days ago brings along:

  • Support for JKSM which is a save manager for the 3DS
    • Originally, 3DSync only supported Checkpoint
  • Custom upload paths are now supported and can be set using the configuration webpage

On the other hand, TWiLight Menu++ 15.1.1 has also been released which packs in:

  • A special version of nds-boostrap which allows one to play 2 DSiWare games as a showcase of nds-bootstrap’s upcoming DSiWare support!
    • The games supported are Pop Island & Pop Island: Paperfield
    • It’s also possible to run these titles on the original DS, DS Lite, 2DS and 3DS with widescreen mode being supported on the latter two
  • An issue was fixed in which the DS Classic Menu crashed on white screens when using it on a DSi with Unlaunch
  • A bug was fixed in which the time wouldn’t change on the 3DS

You may grab 3DSync 0.2.0 from this link while TWiLight Menu++ 15.1.1 can be downloaded from here

Conclusion

Other than these releases, the 3DS also received Savvy Manager 3.0 which adds support for Japanese, European and Australian Girls Mode/Style Boutique games together with many other new features. On the iOS Jailbreaking front, unc0ver 5.0.0 has been released with support for iOS 13.5 (latest version) on ALL devices including A12/A13 ones!

The post PS4 & 3DS News: PPSSPP core coming to RetroArch for the PS4 with GTA Vice City Stories running well & 3DSync 0.2.0 together with TWiLight Menu++ 15.1.1 released for the 3DS! appeared first on Wololo.net.

PSP & PS2 Releases: PPSSPP 1.10 released with numerous graphical & performance improvements and lots more & FreeDVDBoot released for the PS2 allowing one to run homebrew on an unmodded console!

$
0
0

Back in the late 2000s, most of the cool kids owned either a PlayStation 2, PSP or both with the PS3 still gaining traction! Moving forward a decade, the former two consoles are still getting love from the community owing to their huge success and in this article, we’ll be looking at PPSSPP 1.10 & FreeDVDBoot for the PS2!

PPSSPP 1.10 is out with many graphics, compatibility and performance improvements together with some new features!

PPSSPP is synonymous with PlayStation Portable emulation since it’s the de facto emulator for emulating the console thanks to its excellent performance, high compatibility and support for a wide range of platforms. With the emulator having been around since 2012, it is considered pretty mature but updates are still provided every now and then with PPSSPP 1.10 having been released yesterday.

As per the changelog on PPSSPP’s official website, this update brings along:

  • Numerous graphical and compatibility fixes with games such as God of War (commit) being positively affected
  • Games now load faster
  • Some minor performance improvements
  • Support for navigating menus with an analogue stick, more languages in in-game dialogues and simple multiplayer chat
  • More advanced post-processing is now available
  • Camera support on Windows, Linux and macOS
  • The ability to use VSync on all backends
  • Various other improvements including mouse support in SDL builds, HiDPI retina display support, rapid-fire for touch controls, the ability to resize game icons and much more

You may grab PPSSPP 1.10 from this page by selecting the platform of your choice. Android users may get it from the Play Store where the update rollout should be finished within a week.

CTurt Releases FreeDVDBoot exploit for the PlayStation 2

With FreeDVDBoot, all you need is a normal DVD to hack your PS2 and run homebrew with backup loading support in the works! (Video by CTurt)

Moving to the PSP’s older sibling, interest in exploit development for the PlayStation 2 still seems to be there as evidenced by CTurt, a well-known figure in hacking scenes, releasing FreeDVDBoot. While the PlayStation 2 has been hacked for years, the options for hacking it aren’t too straightforward as they require messing around with memory cards, opening up the console, installing a modchip or a HDD expansion bay but with FreeDVDBoot, all you need is a simple DVD to run your favourite homebrew!

This was achieved by exploiting the console’s DVD Player with the methods used being nicely described in technical write-up found below which intends to complement the exploit’s release. Using the exploit is pretty simple as all it has you doing is downloading an ISO file, adding homebrew to it (or simply running it off USB storage via the pre-bundled uLaunchELF homebrew), burning it and running it on your console. Further development is planned including support for multi-file homebrew (homebrew that loads other files from the DVD like emulators – this is achievable by recompiling homebrew with a freshly compiled PS2SDK since a PR adding DVD Video support was recently merged), the ability to load PS2 game backups with ESR and some optimisations to make the exploit boot faster while removing screen flicker occurring when triggering the exploit.

Instructions on how to use FreeDVDBoot can be found in its GitHub Repository & you may read the technical write-up here which contains information on the aforementioned future plans. FreeDVDBoot was only tested on the 3.10E & 3.10U versions of the PS2 DVD Player

Other News

Staying on the topic of emulation, the popular emulator Mupen64Plus-Next received an update to version 2.1 while Cemu 1.19.3 was publicly released for all to enjoy.

The post PSP & PS2 Releases: PPSSPP 1.10 released with numerous graphical & performance improvements and lots more & FreeDVDBoot released for the PS2 allowing one to run homebrew on an unmodded console! appeared first on Wololo.net.

Emulation: PCSX2 finally gets 64-bit version for Windows, Linux and macOS & PPSSPP 1.10.1 released to fix some crashes

$
0
0

Important Note: We are aware of TheFlow releasing a kernel exploit for the PlayStation 4 up to Firmware 7.02. As this needs a WebKit exploit to be used in the creation of a jailbreak, it is IMPERATIVE you stay on Firmware 6.72 or below for the time being as that is the highest version with a public WebKit exploit! An article will come in the following hours.

With the PlayStation 2 being the best-selling console of all time, it is a source of nostalgia for many and as a result, interest in emulating it is pretty high. In this article, we’re going to look at PCSX2 going 64-bit together with the release of PPSSPP 1.10.1 which is an emulator for the PSP.

PCSX2 finally goes 64-bit on Windows, Linux and macOS

PCSX2 has finally gone 64-bit although 32-bit build ars still being provided!

It is no secret that PCSX2 is the go-to emulator for PlayStation 2 emulation but something that many may not know is that it’s been a 32-bit binary up till now with even the recently released PCSX2 1.6.0 being so!

However, that has now changed as 64-bit support has been finally implemented as evidenced by a pull request also containing downloads for Windows & Linux versions of the emulator compiled for running on x86_64 systems.

As of right now, there seems to be no significant performance comparisons between the 32-bit and 64-bit versions so whether 64-bit builds improve performance remains to be seen. However, performance isn’t the only reason why building for 64-bit platforms is a good idea since 32-bit support has already been dropped in the latest version of macOS with other OSes potentially following suite in the future while also eliminating the need to install 32-bit versions of required libraries alongside 64-bit ones as most computers nowadays run 64-bit operating systems.

You may get nightly builds for Windows & Linux based on the upcoming PCSX2 1.7.0 branch by following this link.

PPSSPP 1.10.1 released with Android-related fixes


Staying on the topic of Sony console emulation, the go-to emulator for the PlayStation Portable, PPSSPP, was updated to version 1.10.1.

PPSSPP 1.10.1 is a minor release mostly fixing Android-related issues together with a D3D9 fix

This comes just a few days after the release of PPSSPP 1.10 which is considered to be a major release and as a result, PPSSPP 1.10.1 is a pretty minor release to this already-mature emulator which comes with save state support, the ability to render at higher resolutions and much more. Its primary aim is that of fixing some frequently occurring crashes observed after the aforementioned major release in order to keep the emulator running without issue for the vast majority of users.

As per its changelog, this update brings along:

  • Fixes to common crashes happening on Android with one having to do with save states and another with downloading
  • A fix for an issue related to offset rendering in the Direct3D 9 backend

You may download PPSSPP 1.10.1 from the Downloads page on the official website or from the Play Store on Android.

Other News

On the PSVita, progress seems to be picking up in porting Flycast with Rinnegatamante getting the core up and running in RetroArch after a ReDream port turned out to be infeasible. Games are already booting on the core although rendering is garbled at the current moment in time.

The post Emulation: PCSX2 finally gets 64-bit version for Windows, Linux and macOS & PPSSPP 1.10.1 released to fix some crashes appeared first on Wololo.net.

PSVita News: TheFlow working on plugin to potentially get PSP resolution hacks working on more games! – More 960×544 PSP games on the Vita may be possible

$
0
0

Earlier this week, TheFlow created yet another PSP resolution hack and this one allows Tomb Raider: Anniversary to run at native resolution (960×544) on the PlayStation Vita. However, he is working on something more sophisticated than game-specific resolution patches with a brand new plugin he mentioned on Twitter!

The current state of PSP native resolution patches on the PSVita

Native resolution PSP games on the PSVita has been something that many have dreamed for but now, TheFlow may be working on a solution!

While resolution hack plugins for PSP games running on the PlayStation Vita have been created for a few popular titles such as GTA LCS/VCS and now, Tomb Raider, the vast majority of PSP games can only render at the usual 480×272 resolution on the Vita. As a result, they don’t look as nice on the PSVita’s larger 5″ screen with a 960×544 resolution as the options available are to either make the game look blurrier (using Advanced AA) or pixelated which could make one look at other options such as PPSSPP on their smartphone or Switch as it allows games to be rendered at higher resolutions.

While there has been a bounty on BountySource since August of last year to get PSP games running at native resolution on the PSVita perhaps by using the PPSSPP renderer, this hasn’t resulted in much despite $1500 being up for grabs although a developer called Michal (‘robots’) was working on it with the last update being in April of this year. While $1500 may sound like a decent sum, it is important to state that getting PSP games running at native resolution on the PSVita requires a huge amount of work and $1500 would be little compensation for the hours that would be spent in order to create such a solution.

TheFlow potentially working on a native resolution hack plugin that many games could benefit from!

TheFlow’s working on a plugin that seems like a more generic native resolution patch that could support many games but hacks like reducing colour depth may be needed for playable performance at 960×544! (Tweet)

Moving over to the latest developments, TheFlow tweeted out that he is working on a rendering-related PSP plugin that many games could benefit from. From the tweet, the aim of this plugin is to patch display lists (graphics commands that define the output generated on screen) and vertices coming from the PSP’s graphics engine which sounds like a generic native resolution hack plugin is in the making!

It is important to state that resolution patches reduce the performance of the games they’re applied to as they’re still being rendered on the PSP’s hardware found inside the PlayStation Vita & PlayStation TV. As a result, some games may be able to be rendered at higher resolutions with the plugin that TheFlow is working on but they may not all be playable. Furthermore, little information has been given on this plugin so there is no saying which state it’s in or whether it’ll ever be finished.

Conclusion

As usual, the best way to keep up with what TheFlow is up to is to simply follow his Twitter account and not ask for ETAs as that could get you banned from seeing his tweets. You may also support TheFlow on Patreon by following the link below but remember, patience is key and only the future will tell us if anything comes out of TheFlow’s work on the aforementioned resolution hack plugin that could work on many games!

TheFlow’s Twitter: https://twitter.com/theflow0

TheFlow’s Patreon: https://www.patreon.com/TheOfficialFloW

The post PSVita News: TheFlow working on plugin to potentially get PSP resolution hacks working on more games! – More 960×544 PSP games on the Vita may be possible appeared first on Wololo.net.


PSVita: TheFlow releases GePatch, a plugin that lets you play 50+ PSP games at native resolution on the Vita! – Titles include Disagea & Sims 2 with more to come

$
0
0

As reported yesterday, TheFlow has been working on a generic plugin to make PSP games run at native resolution on the PSVita but little details were available then. After a few hours, TheFlow came forward with a brand new plugin called GePatch which already allows 50+ PSP games to run at 960×544 on the Vita with frequent updates being pushed!

What is GePatch?

PSVita: TheFlow releases GePatch, a plugin that lets you play 50+ PSP games at native resolution on the Vita! - Titles include Disagea & Sims 2 with more to come

GePatch allows you to play over 50 PSP games on your Vita at native resolution very well!

GePatch is a plugin by TheFlow that allows some PlayStation Portable games to run at the PlayStation Vita’s native resolution of 960×544 within Adrenaline which is an ePSP solution by the same developer. From a tweet shared earlier this week, GePatch seems to work by patching display lists and vertices within the PSP’s graphics engine meaning that the games are still rendered using the PSP hardware found within the PSVita’s and PSTV.

This is approach differs from what was being floated last year in regards to getting PSP games running at native resolution on the PSVita as that approach revolved around porting PPSSPP’s graphics renderer to the console. According to TheFlow, the approach he took is “cheaper” compared to the PPSSPP renderer option and initial results are showing that it’s working in a quite a decent amount of titles!

Which games are supported by GePatch?

Ever since its release under 24 hours ago, GePatch has seen 4 updates which fix various issues! (Tweet)

After releasing GePatch, TheFlow created a spreadsheet on Google Docs that community members could contribute to and in under 24 hours, there are already over 350 entries inside of it consisting of PSP games, PS1 games and even homebrew. Among the games that are considered playable after having their resolution increased to 960×544 with GePatch, one finds:

  • Disagea Infinite, Disagea 2: Dark Hero Days & Disgaea: Afternoon of Darkness
  • Sims 2
  • Loco Roco
  • FIFA Street 2
  • Retro City Rampage DX
  • Ys I & II Chronicles
  • Various others including Toy Story 3 and Lord of Arcana with community members testing much more!

Conclusion

To grab GePatch and install it on your device, simply follow the link below to its GitHub Release Page & README. In order to see whether a game is compatible with the plugin or add your own test results, you can view the Google Docs Spreadsheet below. It is important to state that the plugin has seen 4 updates in the last 24 hours with version 0.1.4 being released under an hour ago so make sure you’re on the latest version!

GePatch GitHub README (instructions): https://github.com/TheOfficialFloW/GePatch/blob/master/README.md

GePatch GitHub Release Page (download): https://github.com/TheOfficialFloW/GePatch/releases

GePatch compatibility spreadsheet: https://docs.google.com/spreadsheets/d/1aZlmKwELcdpCb9ezI5iRfgcX9hoGxgL4tNC-673aKqk/

TheFlow’s Twitter: https://twitter.com/theflow0

TheFlow’s Patreon (donations): https://www.patreon.com/TheOfficialFloW

The post PSVita: TheFlow releases GePatch, a plugin that lets you play 50+ PSP games at native resolution on the Vita! – Titles include Disagea & Sims 2 with more to come appeared first on Wololo.net.

PSVita Release: TheFlow releases Adrenaline 7.0 allowing GePatch to work with more games – Over 170 PSP games playable @ native resolution + 231 with minor issues!

$
0
0

For over a year, Adrenaline for the PlayStation Vita hasn’t seen any updates simply because it reached a mature-enough state with no deal-breaking issues. However, developments brought about by GePatch made TheFlow push Adrenaline 7.0 which allows more PSP games to run at the Vita’s native resolution and more!

What is Adrenaline?

PSVita Release: TheFlow releases Adrenaline 7.0 allowing GePatch to work with more games - Over 170 PSP games playable @ native resolution + 231 with minor issues!

With Adrenaline, you effectively turn your PSVita into a PSP on steroids and with Adrenaline 7.0, there are over 400 PSP games to play at the Vita’s native resolution with little to no issues!

While the PlayStation Vita has a decent game library of its own that’s more appealing to those who enjoy Japanese titles and/or indie games, a good deal of people bought the console as a way to experience PSP games better through the various enhancements the console brings including a larger screen. In order to get the full PSP experience, one needs to hack their console and use an ePSP hack with the de facto one that most use being TheFlow’s Adrenaline!

Other than simply allowing you to play your favourite PSP & PS1 games, Adrenaline comes with its own fair share of added features including:

  • The ability to experience the original PSP experience by running XMB and letting you use plugins
    • Adrenaline also supports Vita-specific plugins including right analogue stick patches and GePatch which allows one to play many PSP games at 960×544 (Vita’s native resolution)
  • Screen filters such as Advanced AA which make games look less pixelated when they are running at the PSP’s native resolution
  • 64MB RAM in PSP homebrew which allows PSP 2000+ homebrew to run properly
  • Various other stuff including the ability to transfer files via USB, WiFi support, compatibility with udcd_uvc allowing you stream your console’s screen to a PC via USB & much more!

What does Adrenaline 7.0 bring along?

Monster Hunter Freedom fans take note – you can play the game at native resolution on your Vita!

Adrenaline 7.0, which was released over 1.5 years after Adrenaline 6.9, comes with:

  • A fix for an issue in which plugins were loaded in recovery mode
  • The native display buffer has been moved to a different location allowing GePatch to work with more games

With Adrenaline 7.0 & GePatch 0.18.1, one can play 177 PSP games at the Vita’s native resolution with a further 231 listed as having minor issues as per a community-maintained compatibility spreadsheet. You may see compatible titles by following the link to the spreadsheet below.

Conclusion

To download Adrenaline 7.0, simply follow the link below to its GitHub Release Page and follow the instructions found within the GitHub Repository’s README. You may donate to TheFlow via Patreon.

Adrenaline 7.0 download link: https://github.com/TheOfficialFloW/Adrenaline/releases

Adrenaline 7.0 installation instructions (read before updating or installing for the first time!): https://github.com/TheOfficialFloW/Adrenaline/blob/master/readme.md

TheFlow’s Patreon: https://www.patreon.com/TheOfficialFloW

TheFlow’s Twitter (future updates): https://twitter.com/theflow0

GePatch compatibility spreadsheet (which games can be played at native resolution): https://docs.google.com/spreadsheets/d/1aZlmKwELcdpCb9ezI5iRfgcX9hoGxgL4tNC-673aKqk

The post PSVita Release: TheFlow releases Adrenaline 7.0 allowing GePatch to work with more games – Over 170 PSP games playable @ native resolution + 231 with minor issues! appeared first on Wololo.net.

PSP Release: Xerpi ports udcd_uvc to the PSP allowing one to stream its screen to their PC, Mac and even Android device – Currently in PoC stage with a 20FPS framerate!

$
0
0

One of the staple plugins for the PlayStation Vita is xerpi’s udcd_uvc which effectively turns the device into a hybrid console allowing you to play games on the big screen as well. Now, the same developer is working on porting the plugin to the PlayStation Portable with a PoC plugin that outputs 20FPS already being available!

Xerpi ports udcd_uvc to the PSP

With udcd_uvc for the PSVita, you could stream the console’s screen to a PC, Mac or even Android device via USB with a recent update adding support for the latter two. Now, the plugin has been ported in PoC form to the PSP!

In May, xerpi added a GitHub repository called ‘psp-uvc-usb-video-class’ and mere hours ago, he released the first PoC (proof-of-concept) version of the plugin which is a port of Vita’s udcd_uvc. Like udcd_uvc, the PSP UVC Video Class plugin (which seems to be its official name) allows you to stream your PSP’s screen to a computer or smartphone via USB which translates into playing games on a bigger screen. This is done by effectively turning the PSP into a UVC (USB Video Class) device similar to a webcam thus allowing you to view its screen on your PC although it must be noted that no audio is streamed!

Streaming the PSP’s screen to a PC via USB is something that has been done before with Remote Joy Lite but this solution only works on Windows and can be problematic with some games.

Current state of xerpi’s plugin & future plans

According to its GitHub release page, the recently released plugin is a proof-of-concept as it does RGB->YUV conversion on the CPU. This results in a frame rate of about 20FPS @ 480×272 which is the PSP’s native resolution – obviously, this is not stellar but xerpi does have some improvements up his sleeve in order to improve performance!

Xerpi’s suggestion on how 60FPS could be achieved if CSC conversion is reduced to 16.667ms or less (from GitHub Release Page below)

The primary improvement is that of making use of the PSP’s VFPU, ME or VME in order to perform faster RGB->YUV conversion rather than the CPU with some functions such as ‘sceMpegBaseCscVme’ and ‘sceDmacplus_driver_0x9C492B9B’ looking promising for the task.

Xerpi also did some performance benchmarks with the PoC which resulted in the following numbers:

  • 32.9ms to perform CSC (RGB->YUY2 conversion)
    • If this is reduced to 16.667ms or lower, then 60FPS could be achieved through double buffering which would result in a one frame latency from capturing the screen to sending it via USB
  • 16.1ms in order to send a 480×272 frame via USB
  • This results in around a ~20FPS framerate with this number being derived by using the formula “1s/(time to perform CS + time to send the frame)”

Conclusion

If you wish to try out xerpi’s PSP UVC Video Class plugin, you can grab the “prx” file from the link below and put it within VSH.TXT or GAME.TXT. Xerpi recommends using PotPlayer on Windows and mpv/mplayer on Linux for the best experience. As usual, it is imperative not to nag xerpi about ETAs for this plugin but he’s known to deliver so cool things may ensue soon 😉

PSP UVC Video Class README (installation instructions): https://github.com/xerpi/psp-uvc-usb-video-class

PSP UVC Video Class GitHub Release Page (download link): https://github.com/xerpi/psp-uvc-usb-video-class/releases

The post PSP Release: Xerpi ports udcd_uvc to the PSP allowing one to stream its screen to their PC, Mac and even Android device – Currently in PoC stage with a 20FPS framerate! appeared first on Wololo.net.

PSVita Release: GePatch 0.19 released with fixes for some crashing games & regressions – Over 180 PSP games can be played perfectly @ Vita’s native resolution with many more only having minor issues!

$
0
0

TheFlow’s GePatch has been out for 3 weeks now and various members of the Vita scene have had their dream come true. However, the initial iteration of software is seldom perfect and TheFlow has kept rolling out updates with GePatch 0.19 being the latest!

What is GePatch?

As more time goes on, GePatch is becoming more compatible with a combined 456 titles being fully playable or only exhibiting minor issues! (Source: spreadsheet linked below)

GePatch is a plugin by TheFlow that allows one to play a good deal of PSP games at the PlayStation Vita’s native resolution which is 960×544. As a result, this plugin makes PSP games running on the Vita & PSTV push 4 times as many pixels than they would normally as the PSP’s resolution is 480×272. In order to increase the rendering resolution of games, TheFlow is patching display lists & vertices within the PSP’s graphics engine found inside the PlayStation Vita.

Compatibility-wise, GePatch is fully compatible with 186 games as of writing this article with a further 270 titles being able to run with minor issues ranging from menus that look a bit messed up to performance problems that some can live with.

What does GePatch 0.19 bring along?

GePatch 0.19, which was released yesterday, is an update that aims to fix certain issues in order to increase compatibility with its changelog stating:

  • Some bugs that made certain games crash were fixed

    As per testing by community members, Super Stardust Portable is now fully playable!

  • An issue that was introduced in earlier versions (a regression) was fixed
  • From comments left within the compatibility spreadsheet, GePatch 0.19 provides an improved experience in the following titles:
    • Super Stardust Portable – perfectly playable
    • Super Strike Portable – perfectly playable
    • Crash of Titans – no longer crashes but has minor issues
    • Crash: Mind Over Mutant – no longer crashes but has minor issues
    • Dokodemo Issyo Lets Gakkou Obenkyou Pack – this game is now fullscreen
    • Dragon Quest & Final Fantasy in Itadaki Street Portable – no longer crashes but has minor issues
    • Fat Princess: Fistful of Cake – works much better although FPS drops & black FMVs are still there
    • Other titles that you can check out in the compatibility spreadsheet linked below

Conclusion

You may get GePatch on your PlayStation Vita or PlayStation TV by following the link below. In order to use GePatch 0.19, you must be using Adrenaline 7.0 else it won’t work so make sure you update!

GePatch 0.19 download link: https://github.com/TheOfficialFloW/GePatch/releases

GePatch README (installation instructions & more): https://github.com/TheOfficialFloW/GePatch/blob/master/README.md

GePatch Compatibility Spreadsheet: https://docs.google.com/spreadsheets/d/1aZlmKwELcdpCb9ezI5iRfgcX9hoGxgL4tNC-673aKqk/

TheFlow’s Patreon (donations): https://www.patreon.com/TheOfficialFloW

The post PSVita Release: GePatch 0.19 released with fixes for some crashing games & regressions – Over 180 PSP games can be played perfectly @ Vita’s native resolution with many more only having minor issues! appeared first on Wololo.net.

Hacking consoles: a learning journey (part 2)

$
0
0

(Previous post in this series: Hacking consoles: a learning journey, part 1)

Introduction:

Hello, and welcome to this second (or first, depending on how you’re keeping count) installment of my learning journey. Don’t worry, this name is temporary, and I will be talking suggestions until I find a more fitting one.

In my introduction post, I… well, introduced you to what this series was going to be, and wrapped up by telling you that I was planning on using a Debian Linux distribution to do most of the hacking. I quickly ran into some issues that I will explain here, and had to switch to Windows, so that made me reconsider things a little. I will henceforth be switching from OS to OS depending on what works best. As a disclaimer though, if you can get anything I do to work on another platform, please do as you prefer, since there won’t be much difference apart from installation procedures.

Today’s summary:

Something I think I will be doing often in this series is a summary of the day, for the reader to have an idea of the topics that the current post holds.

For a first post, I thought going simple was the best decision. Getting started with such a technical field isn’t an easy task, so focusing on one “simple” concept at a time, especially in the beginning, seems more fitting.

For all those reasons, today’s topic will be PSP gamesave exploits. The PSP is already relatively old, which means two things: first, accessing exploits and writeups will be very much easier than on more recent consoles. This is good, since our goal is to understand hacking, and not to make any breakthrough discovery. The other thing that we can deduce isn’t that good for us, however. Since the PSP scene isn’t active anymore, the tools that we will need to get started most likely won’t be actively maintained, which means that we could have issues with using them on a recent OS.

Getting started:

If we follow Wololo’s 2009 guide on gamesave exploits for the PSP, we can establish a list of tools that will be needed:

  • The Savegame Deemer plugin
  • PSPLink
  • A PSP with its USB cable
  • A hexadecimal editor
  • A brain

So far, everyone who wants to follow along should at least have the PSP and cable. Apart from that, we will start working on getting PSPLink to work, installing Savegame Deemer, and maybe get myself a brain if I have some time left.

When I initially got into writing this article, I was very eager to get going, and started by installing PSPLink and the tools that go along with it. I spend way too long trying to get everything working on Debian and in VirtualBox, since I was working with a broken website (ps2dev.com, home of the PSPSDK and psptoolchain projects, has been down for a long time [Note from wololo: this was such a great resource for all console enthusiasts out there. The internet archive has a snapshot from 2008]) and couldn’t get anything to work by compiling the projects from source.

After spending a whole week trying to get the separate tools working on Debian, I gave up and installed the Minimalist PSPSDK on Windows. That, thankfully, worked almost right out of the box, so this will be our solution of choice here. Here’s the link. The plugins needed for psplink to work are all under the “C:\pspsdk\psplink“ folder on your hard drive after installing this software.

The savegame deemer was very easy to install on the PSP, since it was just some .prx file to put in the PSP’s seplugins folder and to activate. I found a cool Wololo easter egg hunt code on the download page, which was funny, but this was otherwise done very quickly.

A quick word on getting plugins to work: you need to put the various .prx files in the “seplugins” folder of your PSP, and to add a line with their filename followed by a space and a “1” in two files called “game.txt” and “vsh.txt”.

I also installed HxD on my computer as a hexadecimal editor, but as for the brain, however, I still can’t get my hands on one. I guess we’ll just have to work without it for the time being.

The hacking:

And, finally, we arrive at the actual hacking part. This is where I will regularly do my best to follow in the scene’s footsteps, in order to explain my learning process, my hurdles, and all in all my experience with the matter at hand.

The first thing that must be done is to get our hands on a vulnerable game, which would here be the Japanese demo of Phantasy Star Portable. Surprisingly, I had a Japanese UMD of this game lying around, so I will be able to work with the full version. Remember kids, downloading ROMs of games you don’t already own is illegal, and shouldn’t be done under any circumstances.

I should also establish that some knowledge of programming is preferable to have since I will not explain any code I use here, except from the part specific to hacking. Now, let us get on with the hacking.

For starters, you need to link your PSP to your PC using a USB to Mini-USB cable. Windows will not recognize your console as a device, however, until you install a thing called the “Type B PSP drivers”. But that wouldn’t be any fun if it was easy and straightforward to do, so let’s get on with it.

Since Microsoft is very big on security when it comes to their Windows platform, installing arbitrary unsigned drivers isn’t the easiest thing to do. You need to boot into a specific mode, and then use a tool called libusb-win32 to get the job done. The easiest way to do the first part is to click “Reboot” in the start menu while holding your SHIFT key, until a special screen comes on and gives you a bunch of options. You need to navigate under “Troubleshoot”, then “Advanced options” and finally “Start-up settings”, which sometimes is hidden under the little “More options” text under the first few choices. What’s then left to do is to press the F7 key, and Windows will reboot without those pesky safety measures.

Once you have signed into your session again, you will need to use a little piece of software called libusb-win32, which will enable driver installation for any device connected to your PC. In this software, all that’s needed is to launch the file called “inf-wizard.exe” in the “bin” folder, press “next” once and select the Type-B PSP driver that shows up (you need to be anywhere on your PSP except from the USB mode, otherwise Type A will show up instead). You then need to save some files someplace of your choosing, and let the program do its job. If some warning message shows up about the unsigned driver, confirm that you know what you’re doing and go on with the process.

And now that all of this is out of the way, you should hear a satisfying Windows USB sound every time you start up your PSP while it is plugged in. If that isn’t the case, make sure you did everything right, and if nothing works, try using the RemoteJoy plugin on your PSP to force it into trying to interact via USB, and then redo the libusb-win32 stuff. If everything worked as intended, just launch “usbhostfs_pc.exe” as administrator and “pspsh.exe” as a regular user in the “C:\pspsdk\bin” folder, and if your PSP is plugged in, you should have a nice console waiting for your input in pspsh.exe.

Now it may not seem like it, but we are relatively close to being able to exploit something on our console. You see, as Wololo explains, there are sometimes things that are overlooked during game development, and buffer overflows are one of them. You see how, when you name your character in any game, you have a character limit? Well, if you somehow manage to write a longer name than the maximum allowed, the end of your name ends up somewhere in the game’s save memory that wasn’t designed for this, and that will maybe be read some other time during the game’s execution. If the game doesn’t prevent names that are too long for its own good from being read, we will then be able to write anything we want where we shouldn’t be able to write anything.

In this game, you need to create a character, and name it something recognizable. Since this is a Japanese game, most of you will not be able to read what is written, and I will guide you through the few menus we need to navigate. First, press the START button, then the O button on “new game” on the title screen. You will then be presented with a character on the right, and a few options on the left. The only one you don’t want to use is 戻る (modoru), which, as TheFloW taught us, means “To go back”. Instead, you want to choose 次の設定へ (tsugi no settei e), which means “To the next setting”. Remember, on Japanese PlayStation consoles, O is used to confirm, and X to cancel. There will eventually be a setting called “名前” (namae), which means “Name”; you need to write something that you will remember in a few minutes. For this example, I will use “wololorocks!” as a character name, and then go to the next menu by clicking the next settings button. You will need to enter another name, which needs not to be the same as the last one. I will use “あ”, which means “a”. You will need to press O a few more times until a cutscene starts playing, at which point you can shut the game down and go back to the PSP’s main menu. Your save file will be located under “PSP/SAVEPLAIN/ULJM0530900” in your PSP’s filesystem.

Once we open the larger file of the three in HxD, we notice that under “Decoded text”, the first line reads “WÿOÿLÿOÿLÿOÿRÿOÿCÿKÿSÿ.ÿ”. This, even that messed up, might remind you of something we wrote not long ago. Now, if we try and overwrite the data with some random text after where our name is written, we should be able to make the game crash upon loading the file, which is the starting point for a gamesave exploit. If we fill, say, the following 10 lines with the letter “a” under “Decoded text” in HxD and load the savefile, some interesting results could happen. Thankfully, when we start up the game and choose the “Continue” option, we see that our name changed from “wololorocks!” to “wololorocksN___________________” (that’s 20 underscores), and that we now are level 97. If we try and load the save… Well, nothing special happens, much to my disappointment.

Sadly, the game seems to only crash in the demo version of the Japanese game, so my convenient full UMD will not do the trick today. We can, however, change games in favour of Gripshift, which is an established way to get a gamesave exploit going, and isn’t written in Japanese! That, however, will be coming in the next post of this series, since I want to keep this in bite-size chunks in order not to write a three-book novel each article.

Conclusion:

We got the PSP driver and PSPLink to work nicely, and even though we didn’t get any exploit going this time, we learnt that vulnerabilities aren’t found easily, and that even the easier methods such as a gamesave crash aren’t often useful in hacking. Next time however, we will be reproducing the famous Gripshift exploit, which should be much more fulfilling, and more functional for our purpose. I hope to have you here for my next post, so until next time, farewell.

Next post in this series: Hacking Consoles: a learning journey part 3

The post Hacking consoles: a learning journey (part 2) appeared first on Wololo.net.

Hacking consoles: a learning journey (part 3)

$
0
0

(Previous post in this series: Hacking consoles: a learning journey, part 2)

Introduction:

Hello, and welcome to this new Learning Journey post! We have a lot of things to discuss today, so strap in for a bumpy ride.

I’d like to start off this installment by talking about all of the things that happened that won’t be included in today’s writeup. Remember when I ended my last post by saying that we would reenact the famous Gripshift exploit? Yeah, that turned out to be impossible. The expoit itself really happened, but it can’t be done again under today’s conditions. Believe me, I’ve tried. At the time, the exploit was found and used on the PSP 5.02 firmware, but on January 19, 2009, Sony released the 5.03 update, which patched it. Being on the 6.61 firmware myself, there is no way I could have possibly done it without downgrading all the way to the 3rd ever firmware available to the PSP 3000, which would have taken far longer than to find another savegame exploit.

So, I after trying to downgrade for a little bit, I quickly switched to hunting for an unpatched exploit that I could do myself. It took me a little time, but I found that Patapon 2 had one, which was historically used as an entry point for the Half-Byte Loader (HBL) by Wololo himself (I might be wrong on this one, but this is what I’ve gathered) [Note from Wololo: the release of that hack itself was an interesting story of betrayal]. So, without further ado, I am sorry for the wait, and let’s get started with hacking into the PSP.

Today’s summary:

All in all, today’s plan is to get something working using Patapon 2. Since it took me a whole week and three days to even  have enough material to get started on this post, I won’t get too greedy and will just get the simplest exploit going.

Getting started:

First of all, you need to get your hands on the game Patapon 2. During the last post we covered the setting up of the whole operation (using PSPLink, savegame deemer, and so on), so that won’t be necessary today. I will be using the exact same setup, so if you missed it, you can go and read it right now.

For those who want to follow along, you’ll need to be up-to-date with this aforementioned last post, the only difference being that we’ll be working on Patapon 2 instead of Phantasy Star Portable.

The hacking:

I’ll admit, without having to set everything up like last time, when it came to hacking (meaning, when I was done with hunting for the right thing to use), the whole thing was surprisingly easy. When you start up the game, the only thing to do is to create a new game, make your way through the unskippable first level, and save your game by hitting select in the hub area of the game. You can give yourself whatever name you want, as long as you can remember it for later.

The opening sequence is about 5 minutes long and you actually have to play it, but it’s a fun experience.

If you read my post last week, you know that it’s time to get into our hex editor and get hacking.

If you installed the Savegame Deemer plugin correctly on your PSP, you should have your decrypted save on your PSP, in the /PSP/SAVEPLAIN/UCUS98732_DATA01 folder of you memory stick. Once you’ve found it, open SDDATA.BIN in your favorite hexadecimal editor, and get ready to look for the name you’ve entered earlier.

For that, you just have to press CTRL+F, enter your character’s name in the search bar, press enter, and…

Wait, what?

Wait, what? “Can’t find `oct0`”? Well, I must have entered the wrong name, let me check…

The truth is, every game has its own way of storing information. Oftentimes, like it’s the case here, your name won’t just be saved as-is, and you’ll have to do some digging around in order to find where it was really saved. For this, you have two options: get creative, or comb the file to find what you’re looking for. I’m pretty lazy, so I started entering some random things, like a space between each letter and so on, until I found it. In a Patapon 2 save file, your name is actually saved as-is, but each character is encoded using 4 bytes when they only need 2.

That means that there is an empty space (a null byte) between each letter that you’ve entered. For this kind of scenario, you’ll have to search for the hexadecimal directly. You’ll first need to convert your plain-text name into hexadecimal (in my case, oct0 is 6F 63 74 30), and then edit it as you need. This time, we’ll have to search for 6F 00 63 00 74 00 30 00. Be careful to search for hexadecimal and not text, otherwise you won’t find it even then.

Yeah, that’s more like it.


Alright, now that we’ve found our name in the save file, the real fun can begin. We could very well fill the whole area with a single character to make it easy, but one thing I’ve though of is that we’ll need to find exactly where in the file we need to insert the technical stuff, and that won’t be possible if every byte is identical to the other ones. Hence, I can only suggest you to do as I did:  fill several lines with growing numbers.

If every byte is the same, how can we find which one is interesting?

Alright then, the next thing we need to do is fire up usbhostfs_pc and psplink as we did last time, and load our game save.

Once we’ve loaded the save, the only thing we need to do is press “R” when presented with the hub, since we need our name to be displayed on screen in order for the game to crash.

Great! And now, since we didn’t fill the whole thing with one character, we know exactly where to strike.

Great, it worked! And now, there is only one thing to do, and that is to get exploiting. But this, ladies and gentlemen, will be saved for another time, since I haven’t even gotten started on it.

Conclusion:

We finally got to an interesting result! Even if we didn’t use the gripshift exploit in itself, we are exatcly on the same path, and we will most likely be able to make some kind of breakthrough next time. Don’t hesitate to go bug me on Twitter at @theoct0 about this post, and until then, farewell.

The post Hacking consoles: a learning journey (part 3) appeared first on Wololo.net.

Hacking consoles: a learning journey (part 4)

$
0
0

(Previous post in this series: Hacking consoles: a learning journey, part 3)

Introduction:

Hello and welcome to my Learning Journey! Last week, we ended up being able to crash Patapon 2 the way we wanted, using a forged player name in our save file. This might have not seemed like much at the time, but this was in fact the first step towards actually achieving something.

Now, before even starting today’s post, I’d like to fix a mistake in the last one: as an anonymous user pointed out in the comments, I messed up my bits and bytes when talking about the name in the savefile. You see, hexadecimal notation is useful because, in binary, a byte is made of 8 bits, and we can shorten that by a factor of 4 in hexadecimal. That’s to say, FF in hex is 1111 1111 in binary, and A1 will be 1010 0001. So this means that two hexadecimal digits make a byte, and four make two bytes. Hence, if each letter in the save takes up 4 hexadecimal digits instead of 2, they use 2 bytes instead of 1, not 4 instead of 2 like I said.

Today’s summary:

Well, I have something very exciting to present to you today. I managed to get one step further on our hacking path, as I managed to turn our Patapon 2 crash into something bigger. For now, I only made it so that the game exits, but that means that I virtually have control over what is executed in the game, which means that I can load whatever binary program I want now.

I am planning on dividing this in two parts, though. Today, we will be actually calling that exit function without explaining much of the assembly code behind it, and next time, I will dedicate the whole post to diving deeper into the code itself. Thanks to that, people that are here to be entertained will be able to have the simpler version here, and people willing to actually learn the subject will have a little course next time.

Getting started:

Today, we will need a few more tools than we did last time. First of all, you will need a way to do some very simple hexadecimal calculations (Windows’ calculator does that, for instance). You’ll also need the minimal PSP SDK, which we installed a while ago, as well as a code editor (I’ll be using Atom) and our trusty Hexadecimal Editor (HxD for me).

The last thing you’ll need is PRXDecrypter in order to decrypt Patapon 2’s EBOOT. You’ll need to put the content of this file in the /PSP/GAME folder of your memory stick in order for it to be an app on your console.

I will also be following Wololo’s post on writing a binary loader for the PSP, so head there in order to follow along too.

And, lastly, the file(s) I’ll be talking about here will be available on my newly created GitHub repository.

The hacking:

Well, well, well… To be completely honest with you, I don’t really know how to arrange this post. We’ll be covering a lot of things here, a lot of which will be relatively technical (especially to someone new to hacking or low-level programming), so this will be a dense post.

As I mentioned above, I am planning on only explaining the processes in this post, and to explain the actual assembly in a next one, in order to keep things interesting for anyone that isn’t interested in the technical stuff. I will still be explaining things a little though, so bear with me.


To start it all off, let’s just understand why what we achieved last time was interesting. You see, when a program is made (Patapon 2, for instance), it all becomes a complex series of instructions executed by the console’s processor. Add this and that, turn this pixel yellow, and so on… And in order to know what to do, and when to do it, there are some variables in that processor. The variable named $ra, for example, tells the program where to go next in its set of instructions (somewhere in the memory).

You can think of it as a very complex role-playing book. “If you decided to attack this person, go to page 18”, for example. Well, this 18 would have been stored in the $ra variable if it was a program running on a computer. That means that, if we can take control of this variable, we can make the program go anywhere we want, and even someplace where we wrote our very own piece of code.

What’s very interesting is that, when we wrote our thing in place of our player’s name in the Patapon 2 savefile, we actually took control of this $ra variable. The direct consequence of that is that we can now write some code in the savefile itself, redirect the processor to that code using the $ra variable we now control, and then make the game run our code. Cool, isn’t it?

You see, what’s great is that when a game interacts with its game save, the game save is (at least partially) loaded as-is in the memory. And, if you remember our thing with $ra, the memory is exactly where the processor finds what to do next. Knowing that, if we can put something for the processor to do in our game save, find the exact memory address (think page 18 from earlier) where this stuff ends up, and then point the game to it using $ra, the processor will be reading our stuff unknowingly.

Wait, what?

Eh… In short: we can write useful stuff, and then we can point the program to it in order to run the cool stuff. Did I make things clearer?


Now, understanding the whole thing is one part of it, actually being able to pull it off is another. For now, the only thing we know for sure is that we have control over $ra, The next step, after that, is to find where the savefile is loaded in the game’s memory, and from that, to find where to put our code in the savefile in order to find it in the memory afterwards.

To move in that direction, the first thing we can do is to get a reading of the game’s memory. When we have that, we’ll be able to find our savefile’s contents inside of it.

For that, we just have to fire up PSPLink, crash our game like we did last time, and once we’re there, we can write this command:

savemem 0x08800000 200000000 memdump.bin

This will create a memdump.bin file in the same folder as PSPLink, so go find it and open it up in your favourite hexadecimal editor. Since you’re there, you should also load the Patapon 2 savefile we worked on in the last post. If you take some part of the savefile and search for it in the memdump file, you should be able to find it pretty easily.

You should be able to find places that are identical pretty easily.

Are you beginning to see the plan here? If we can find parts of the savefile in the actual game’s memory, that means that whatever we in the save here will actually be found in the memory too, and that it has an address as well.

Speaking of address, you are going to want to take note of the offset your pattern begins at, because we need to know what to put in $ra in order to point the processor there. In my case, the pattern I’ve found starts at offset 0x00519720 in the memdump. Since our savemem command we did earlier told PSPLink to gather anything after address 0x08800000 in the memory, that means that we need to do a small addition in order to find the real place our pattern will be located in memory. In our case, 0x08800000 + 0x00519720 = 0x08D19720.


Now, I encourage you to take a break and look back on what we did today, since that’s already a good  amount of information. We learned that taking control of $ra in a game crash was the key to arbitrary code execution, which we are coming to, and that a big chunk of the game’s savefile was found in the game’s memory. We also found this chunk’s actual address in the memory.

Putting all this information together gives us this: we can overwrite this chunk in the savefile with whatever we want, and since we know the address of it, we can use the control that we have over $ra to point the PSP to this pattern we just overwrote, and it’ll execute whatever is in there. Does things make a little more sense?

If they do, great! We can now get to things that will make even less sense!

First of all, you’ll need to grab an ISO of your game. If you already have it, that’s one thing you don’t have to do, but if you’re playing on an UMD, you just have to switch your custom firmware’s USB option from “Memory Stick” to “UMD”. That way, you’ll have access to the ISO file that’s present on it.

When you have that on your computer somewhere, you’ll just need to open this file with your favorite archive manager (I personally use 7-ZIP) and navigate to the SYSDIR folder inside the PSP_GAME folder. Once you’re there, grab the EBOOT.BIN file and save it somewhere nice on your computer.

Your EBOOT.BIN file will most likely be encrypted, so you’ll need to create a folder named “enc” on your PSP’s memory stick, and then put the EBOOT in there. You can now fire up PRXDecrypter, tell it to decrypt the file, and then get it back in the “dec” folder of your PSP. If PRXDecrypter tells you that your file is already decrypted, then good news, you can already work on it as-is.

If you installed the Minimal PSP SDK on your computer like you should have a long time ago, you can now use a nice little thing called prxtool, which we will use to tell us what the function imports of the game are.

I’ll be honest with you, this one took me a long time to understand, and even now I’m not entirely comfortable with it. This is why no explanation will be given here, only the rough process, so if you want to learn exactly how and why we do what we are about to do, everything will be explained in the next post.


In order to manipulate the game with whatever we’re going to overwrite the pattern in the savefile with, we need to know how to call the various functions that the game uses in the first place, since we won’t have access to anything more than that. For this purpose, we can use this command:

prxtool -f EBOOT.BIN

This command will give us the list of function imports sorted by library, but they won’t be of any use until we can translate them to actual function names. That’s where the psplibdoc_660.xml file located in my GitHub repository will be useful:

prxtool -f -n psplibdoc_660.xml EBOOT.BIN

The output of this function will be the same as the one before, but with the actual names of the functions instead of something we can’t use.

Unfortunately, I can’t explain the next part without diving into assembly code, and since that’s planned for the next post in the series…

Basically, the next step is to make the thing that we put in the savefile. In other words, we craft the instructions we want the game to execute, and then put them in the savefile in place of the pattern we chose earlier. The very last step is to set $ra to the address we got earlier, and voilà! What I did was call the function that exits the game in order to see if that worked, and it did.

Conclusion:

Today was quite a heavy day, wasn’t it? We found how to control where the console was going to read the next instructions, and through a whole process of digging into the game’s data, I was able to call the function that quits the game. That might not sound that different from what we did last time, but it really is: now, instead of just crashing the game, we actually have control over how the game behaves, and that’s going to enable a lot of things to happen.

If you want to understand the technicalities of whatever happened today, tune in to part 4.5 to hear me do my best to explain something I don’t fully understand myself. Until then, farewell!


P.S.:

Today was a very, very heavy post for me. I know I’m not the best teacher, and the wall of text above certainly isn’t clear enough, so please come and ask questions, have conversations, and overall help me improve the series on my Twitter account, @theoct0. I’m improving in hacking, but I also need to better myself in teaching, explaining and a lot of stuff, so any help and tips would be much appreciated.

The post Hacking consoles: a learning journey (part 4) appeared first on Wololo.net.


News: Developer starts to work on native resolution PSP games on PSVita and TwiLight Menu++’s widescreen mode for the 3DS finally available with 202 compatibile DS games!

$
0
0

The last few weeks were pretty kind to the Nintendo 3DS & PlayStation Vita and the stream of exciting news is still flowing. In this article, we’ll be looking at some promising news regarding native resolution PSP games on the Vita and Widescreen DS games on the 3DS!

PSVita: Developer ‘robots’ takes on ‘Native Resolution PSP games for the PSVita’ bounty

In the beginning of this month, Reddit User ‘EpicEpsilon1033’ decided to create a bounty for native resolution PSP games on the PSVita. This bounty, which forms part of Rinnegatamante’s recently created VitaNuova community, aims to achieve native resolution (960×544) on PSP games when run on the PSVita by making clever use of the PSP hardware inside the Vita and the console’s own graphics hardware. Following this article, many people shared the bounty online and it’s currently valued at $500 which is a huge increase from the $75 it was at a week ago!

Native resolution for all PSP games on the PSVita is a pretty awesome proposal but only time will tell if we’ll actually get it!

Now, a developer called Michal (nickname: ‘robots‘) has started working on making the bounty come to life. He said that one shouldn’t expect quick progress and went on to provide a rough timeline for his work which includes:

  1. Figure out how to patch the PSP’s graphics module in order to make it redirect Texture/DrawList memory to the Vita’s shared memory rather than the GE’s memory space
  2. Port PPSSPP’s GE to the PSVita – scaling won’t be included at this point
  3. Add scaling capabilities to the above so that native PSVita resolution could be achieved
    • These steps are in chronological order. While they might sound simple, it’s important to keep in mind that they require a tremendous amount of work so don’t expect to see much any time soon unless he pulls a Xerpi 😉

Going through the guy’s GitHub repository list, it seems that he’s dabbled a bit with PSVita-related development in the past but hasn’t made an awful lot of work public. That being said, only time will tell if he manages to get anywhere and we at Wololo wish him the best of luck!

Nintendo 3DS: Widescreen mode finally usable & Twilight Menu++ 9.0.4 released!

Contrary to the PSVita, the 3DS’ homebrew haydays have been over for a pretty long time but noteworthy releases still drop from time to time. One of these releases was Twilight Menu++ 9.0.0 some days ago which came with Widescreen support (lets you play DS games in Widescreen (16:10) thus filling up the 3DS’ upper screen).

Unfortunately, this feature wasn’t useable since TWL Patcher was required and that wasn’t out then. That finally changed on Sunday as Sono released his patcher which can enable Widescreen mode by following a short tutorial on a 64-Bit Windows PC. You can grab TWLPatcher from this link and follow the instructions found here to use it on your console!

Many DS games are a lot of fun but playing them in Widescreen on your 3DS makes them even better!

On the other hand, TWiLight Menu++ received an update to version 9.0.4 yesterday and this brings along:

  • Support for 202 Widescreen Mode games
    • Combined with version 9.0.3, titles like Final Fantasy IV, Pokemon Platinum and Assassin’s Creed II – Discovery are now supported
  • Sanity checks relating to Widescreen mode have been added which make sure that a working copy of ‘TwlBg.cxi’ is present in “sd:/luma/sysmodule” and whether it’s backed up
  • Some small bug fixes having to do with file copying

To grab TWiLight Menu++ 9.0.4 and enjoy DS games in Widescreen, check out this link to grab and install it. Do note that updating via TWiLight Updater doesn’t work as of right now so you must update your binaries manually!

Conclusion

On a concluding note, you might be interested in checking out this article about a significant update to one of the best original PSVita homebrew games called Pingo. Furthermore, there’s also been some nice progress relating to RPCS3 with Demon’s Souls now being playable at 60FPS @ 4K provided you have powerful enough hardware.

The post News: Developer starts to work on native resolution PSP games on PSVita and TwiLight Menu++’s widescreen mode for the 3DS finally available with 202 compatibile DS games! appeared first on Wololo.net.

Hacking consoles: a learning journey (part 4.5)

$
0
0

(This is an explanatory post about Hacking consoles: a learning journey, part 4)

Introduction:

Hi, and welcome to this first “bonus” entry in my Learning Journey. Last time, we were able to take control of Patapon 2 and run the game exit instruction, but I didn’t explain much of it. Well, if what you want are explanations, you’re in the right place! Today, we will be covering the exploit from the ground up, but instead of detailing how we did it, we’ll see why it worked.

Part 1, the crash:

Let’s start things off at the beginning, shall we? The very first thing we did in order to get this exploit going was to crash the game using a forged save file. But why did that work, and why did we do it? Well, one example I like to use when explaining this is that of a roleplay book.

Technically, what made the game crash is called a “buffer overflow”. This kind of problem happens when a program expects a list of elements to be a certain size, so anything written that goes beyond that size ends up somewhere unwanted.

For this example, let’s use a made-up game: The Call of Patapon.

When you open this roleplay book, you are greeted with a question: What is your name, adventurer?

The answer slot is a certain size, and you can only write so much in it, but what would happen if you wrote too much? Where would it end up?

That’s what a normal use would look like.

And that’s what it would look like if just wrote too much, like we did with the actual game.

Well, if you write too much, the book becomes unreadable, and you just can’t go on. But, if you take a closer look, you can see that our uppercase Q (in blue) just overwrote what page the reader should jump to afterwards… I wonder if we could make something out of that? If the reader is stupid enough to go to whatever page we write over “2”, then maybe we can do something out of that?

Part 2, manipulating the console:

After crashing the game and realising we actually have control over where the games goes next, we had to do something out of that. Sadly, since we can’t just modify the game’s code like that, we need to find somewhere to write our instructions. There must be a way in, right?

Well, you see, whenever a game saves data, it writes it in an external file. The thing is, the game needs to load that file again in order to read everything that’s in it. The great thing in all of that is that the save file is something we have control over, to some extent.

Granted we can decrypt the file (we used Savegame Deemer to do that) and then re-encrypt it, we can make the game load anything in its memory. Normally, it wouldn’t be an issue, since the game never goes there to read instructions, but there’s a difference: we’re now telling the game what part of its memory to execute next.

Using PSPLink in the last post, we could get a reading of the game’s memory as it was at the time of the crash. Searching through it, we found that our savegame was loaded as-is somewhere in it, which meant that whatever we could write in it would be loaded too. In order to know where to point the game, we needed to know the exact address where what we wrote would end up in the memory.

So, to sum up: since the save file goes in the memory, we need to write something in it, find its exact address, and then put that address in the right place of the initial buffer overflow.


In more technical terms, we are manipulating the $ra (Return Address) variable of the processor in order to get it to execute unsigned code, which it normally wouldn’t do. That $ra variable would be the page number, in our roleplay book example. In itself, the $ra variable is what tells the program where to read stuff when it’s done with whatever it’s doing in the moment. If we control it, we can point the execution to anywhere instead of the intended return point.

Now, you may be asking yourself: what do we write now? What can we put in the savefile that will be understood and executed by the processor?

You see, when you make a program, you have to write the code for it, and then compile it. Compiling a program is done automatically, and one of the things it does is to import functions.

In a program, functions are bits of code that will be used again, sometimes very rarely, but sometimes almost ubiquitously. One function, for example, will output whatever text you give to it (this function, in C for example, is called cout).

But writing this time and time again every time you create a program would be endless. And so would be writing it once per program and calling it every time you use it. In fact, when you write a program, you will want to import functions from various libraries (collections of useful function that you can call without having to write again).

If you want a real world counterpart, take a car. You can make a car by yourself, create four wheels, an engine, blinkers, electronics and all of this, but the easier solution would be to order the tires and engine from someone, maybe take some spare lightbulbs for the blinkers and do the electronic yourself. Well, you can think of the tire and engine shops as libraries, from which you call the tire and engine functions to include in your program. This is the concept behind function imports.

Now, the reason why I am talking about compilers and function imports is because that’s essential for us: since we can’t really do what we want because we’re still trapped inside Patapon 2, we can only use the function that this game imported when it was compiled. The PSP has much more to offer, but we’re limited to those ones. The way to know which functions are imported and where they are located is a little tool called prxtool. If we use it as-is, however, we won’t know the functions’ names exactly, but only what libraries they belong to; that’s where the xml file comes into play, since it’s the translator we need to identify specific functions.

Part 3, writing the code to run:

And now, we dive (a little) into Assembly. Last time, I ended the post by saying that I could call the function to close the game (which is not the same as a crash, since I exited properly), and I didn’t explain it then. Well, now’s the occasion!

It might be underwhelming to some, and very expected for people who know Assembly, but we are not going to write 1’s and 0’s ourselves. Assembly is more or less the lowest you can go when programming since it’s closest to the machine, but it still has a syntax, and is still very readable to us.

Assembly has got a relatively small list of possible instructions, since it’s so low-level, but we won’t need much there. Since we already have the address for a lot of functions that Patapon 2 use, we can try calling one as a proof-of-concept. The clearest one to see, and the one I chose, is called sceKernelExitGame, and is located at address 0x08A884D4 in the game’s memory. Hence, if we can tell the game to jump there, this function will be called.

Fortunately, we won’t have to do any weird hexadecimal save file editing to get the program to jump to the address, since we already have control over what is executed. We just have to use the “jal 0x08A884D4” instruction to make the game exit.

What jal does is that it tells the machine to go execute whatever is there, and when it’s done, come back to the instruction right after that jal one. Funnily enough, we’re using exactly what we exploited earlier: here, the $ra variable is where the instruction right after jal is stored.

So, when we say “jal 0x08A884D4”, what we really say is “go to that place, read some code, and come back here afterwards”. It’s just that the code itself is the game exit routine.

(I’ve been told to put “.set noat” and “.set noreorder” before my code, but I don’t know what it does. Feel free to enlighten me.)

Part 4, compiling the code, and planting it:

Great, now we have a bit of code to play with. The only issue, though, is that we need to put it in the save file. We could put it like this, but the machine wouldn’t be able to read it as code, and we’d just end up with the same crash we had before.

If we want the machine to be able to read our code, we need to compile it. Compiling is, in short, the act of translating code into machine language, in binary. The commands for that are very simple, and use tools present in the Minimalist PSP SDK:

psp-as loader.s
psp-objcopy -O binary a.out a.bin

Now, we’re left with a little file named “a.binary”. This is our machine-ready code, and if we just open it in our favourite hex editor alongside with the decrypted savefile, we can work some magic.

We need to put the contents of a.bin right in place of the pattern we chose in the save file. Be careful to overwrite what’s there, and not to insert anything before it, because we don’t want the file’s size to change, or the contents to be displaced. Whenever this is all done, what’s left is to start up Patapon 2, get our name to show up on screen as usual, and savour the fact that instead of a frozen screen, the game actually nicely closes.

Conclusion:

Well, that was hard to explain. I’m glad I got everything to work out, and if you have any question, feel free to shoot a message towards @theoct0 as always. I’d love to receive any and every criticism you might have, any tips and tricks, all in all anything you’d like to shoot my way. But for now, until the next post, farewell!

The post Hacking consoles: a learning journey (part 4.5) appeared first on Wololo.net.

PSVita News: You can now play PSP ISOs (games) on FW 3.71 with Chovy Sign and MorrowindUnity (TESUnity) being ported to the console!

$
0
0

To curb hacking the PSVita via the Trinity Exploit, Sony surprisingly released FW 3.71 about a month ago (or 2.5 months after the TheFlow released the Trinity Exploit chain which can be used to hack FW 3.69/3.70). As a result, the latest PSVita firmware is unhackable and for those stuck there, CBPS Team have come up with a solution letting you play PSP games called Chovy Sign. Other than that, we’ll also be looking at the efforts done by Reddit user ‘JimiHeff’ to port MorrowindUnity to the device!

Chovy Sign Public Beta released – You can play PSP ISOs (backups) on PSVita FW 3.71 if you can figure out how

As Sony decided to bundle the PSP’s GPU and CPU inside the PSVita’s motherboard, it can emulate every PSP game out there perfectly but since it can’t accept UMDs, only PSP games available on PSN are officially playable.

Chovy Sign lets you play any PSP backup on FW 3.71 but make sure to check out the linked video to use it as it comes with no instructions!

However, through hacks, you can play any PSP game you want on your PSVita provided you have an ISO and even use XMB/plugins/themes if the ePSP solution you’re using provides such features. On firmwares below FW 3.71, the best piece of software to use for PSP emulation is TheFlow’s Adrenaline which not only lets you play PSP games but also lets you run homebrew that requires 64MB RAM, do savestates and use screen filters among other things.

However, as mentioned above, FW 3.71 doesn’t have the luxury of a native hack so CBPS Team decided to release Chovy Sign (which is the first release in Project Chovy, a toolkit for PSP stuff on the Vita), to allow folks with a PSVita on FW 3.71 some PSP action! From its somewhat poorly written README and release page, all you need is the following to run any PSP game on FW 3.71:

  • Any working PSP game installed from PSN, even demos such as “LocoRoco Midnight Carnival” and “Petz Saddle Club” work if you don’t want to spend a dime
    • Apparently, Chovy Sign works by exploiting the PSP bubble cloning issue which means that if you delete the base game, the “license.rif” (required for PSP games to function on the PSVita) used by clone bubbles is erased and you have to reinstall the base game again
  • A good quality ISO dump of the PSP game you want to play since poor dumps may not work properly
  • A Windows computer to use the tools provided below
  • As there are no properly written instructions on what to do, it’s highly recommended you follow this video by Nagato which details the process in a step-by-step fashion.

To grab the binaries and check out its release page, check out this link. Main credits go to Dots_tb, SilicaAndPina and Motoharu with various individuals including Knofbath, Julio Sueiras and NanospeedGamer helping with testing.

MorrowUnity (TESUnity) being ported to the PSVita

Eventually, you might be able to enjoy Morrowind’s map on the PSVita but don’t expect the full Morrowind experience as TESUnity is a map viewer not a game engine!

While Chovy Sign is pretty exciting for those stuck on FW 3.71, those who aren’t are probably more interested in native homebrew developments for the console with the latest news being a potential port of MorrowindUnity to the Vita. News about it emerged a few hours ago on Reddit when user ‘JimiHeff’ shared a YouTube video of a partially functional port of MorrowindUnity (TES Unity) running on the PSVita which doesn’t get past the initial screen. MorrowindUnity/TESUnity isn’t an engine for Elder Scrolls: Morrowind but it’s a world viewer so with it, you’ll be able to explore Morrowind’s world but don’t expect to be able to enjoy the game in its full capacity.

From the video, it seems that the application can’t access the data folder being passed on to it and refuses to continue further with an error reading ‘The path is not valid’. Now, the scene member behind the port has promised to ask around on the VitaNuova (Rinnegatamante’s community for PSVita homebrew development and bounty creation) Discord for help which may mean that you’ll eventually be able to explore Morrowind’s world on the PSVita!


Conclusion

Obviously, it’s no use to be able to play PSP games on your PSVita without knowing what to play so if you want some recommendations, check out this article about some great PSP titles to play. On the other hand, if you’re interested in more Unity stuff on the PSVita, you should check out this Reddit thread about Unity’s Adventure Demo being ported to it.

The post PSVita News: You can now play PSP ISOs (games) on FW 3.71 with Chovy Sign and MorrowindUnity (TESUnity) being ported to the console! appeared first on Wololo.net.

PSVita Release: GePatch 0.2.0 released with ability to skip GE patches & more – Over 200 playable games & almost 300 titles running with minor issues @ the Vita’s native resolution!

$
0
0

Hard-drive failure managed to raze every article published on Wololo for the last 4 months which is quite unfortunate but this will not stop new content from being published while older articles are recovered! As the site is back up, we’ll be looking at TheFlow’s GePatch 0.2.0 that was released last weekend which improves some games but introduces regressions in others!

What is GePatch?

PSVita Release: GePatch 0.2.0 released with over 200 playable games & almost 300 titles running at minor issues @ the Vita's native resolution!

With GePatch, PSP games can be run at native resolution the Vita which makes them look much better but not all games are fully compatible!

GePatch is a plugin by TheFlow for the PSVita & PlayStation TV that allows one to play PSP games at the consoles’ native resolution of 960×544 through the highly popular Adrenaline ePSP solution. This means that games have to push 4 times as much pixels than they do normally as the PSP’s screen only has a measly resolution of 480×272 but a good amount of games respond well to this which is pretty surprising considering that with GePatch, games are still running on the PSP hardware found within the PSVita!

According to some tweets made by TheFlow, GePatch is able to achieve 4x resolution upscaling by patching display lists and vertices within the PSP’s graphics engine which allows it to support a wide variety of games. This required less effort than porting PPSSPP’s GPU which was floated as a potential solution for running PSP games at native resolution on the Vita a while ago.

What does GePatch 0.2.0 bring along?

As of right now, there are 200 games that are perfectly playable with GePatch but it’s advisable to check the spreadsheet below first to check which version is best to use with the game you want to play! (Chart from spreadsheet below)

GePatch 0.2.0, which was released during the weekend, comes with:

  • The ability to bypass GE patches by holding the L-trigger when starting a PSP game
    • This allows one to properly play games that do not work too well with GePatch while still having the plugin installed
  • The framebuffer copy algorithm and behaviour of the sync opcode have been updated
  • Forced dithering (down to 16-bit colour from 32-bit) has been disabled
  • TheFlow notes that this update adds flickering to some games meaning that GePatch 0.19.1 may work better in some titles but consulting the compatibility spreadsheet linked below is always recommended!
  • Games that saw improvement as per the compatibility spreadsheet include:
    • Fat Princess: Fistful of Cake – better performance
    • Rurouni Kenshin: Meiji Kenkaku Romantan – Saisen – better performance
    • flOw – almost perfect
    • Medal of Honor: Heroes 2 – game is playable but there is some clipping
  • Titles affected by the flickering issue include Gitaroo Man Lives!, Gurumin: A Monstrous Adventure and others

Conclusion

You may grab GePatch 0.2.0 from the link below but do note that in some titles, flickering issues have been introduced so use it with care! To check out whether the game you wish to play is playable, you can check out the spreadsheet linked below which is maintained by the Vita community and comes with pretty nice formatting.

GePatch 0.2.0 download link: https://github.com/TheOfficialFloW/GePatch/releases

GePatch Compatibility Spreadsheet: https://docs.google.com/spreadsheets/d/1aZlmKwELcdpCb9ezI5iRfgcX9hoGxgL4tNC-673aKqk/edit#gid=0

The post PSVita Release: GePatch 0.2.0 released with ability to skip GE patches & more – Over 200 playable games & almost 300 titles running with minor issues @ the Vita’s native resolution! appeared first on Wololo.net.

PSP Release: Baryon Sweeper lets you unbrick PSP 2000/3000, Pandora battery style

$
0
0

The Pandora battery was probably the most important release of the PS hack scene: a simple hack of the PSP battery, allowing the console to enter service mode. And from there tinker with the device, in particular to install and run custom firmwares, or flash a clean firmware on a bricked PSP.

But Sony fixed the PSP’s service mode process with new hardware revisions, making the Pandora battery useless on newer PSP Slim (PSP 2000) and all PSP Brite (PSP 3000) models. There were a few attempts at making Pandora work on these models (Datel at some point famously announced the Blue Lite tool, allegedly a Pandora battery for all PSPs, but the hacking device was never released).

More than a decade later, developer khubik and a bunch of other hackers on PSPx.Ru have just released Baryon Sweeper, a tool that finally makes a Pandora-like process possible on most (possibly all in the near future) PSPs.

The process is not for everyone, as it involves tinkering with a bit of hardware to create your own “advanced” Pandora Battery with an Arduino, and download some files that might or might not be based on Sony copyrighted material.

Nonetheless, people who have tried it confirmed that it works, and the list of contributors is impressive, for anyone who’s known the PSP scene for a while. This tool might not be for everyone at the moment (also, nobody would blame you at this point if you threw away, or sold, a PSP 3000 you bricked more than 10 years ago), but it’s possible we’ll see people starting to sell more “customer friendly” versions of the battery, or entrepreneurial folks might want to start buying bricked PSPs on eBay to try and revive them.


Baryon Sweeper Credits

Khubik credits the following people for the release (google translated from russian):

  • M4j0r – help with the operation of the Voltage Fault Injection Siskon glitch;
  • Wildcard, Sean Shablack – Glitch exploitation and siskon dump;
  • Proxima – reverse engineering of the Siskon firmware, a script for generating responses to authentication requests;
  • khubik – battery emulator code, script port for generating responses, interface design;
  • dogecore – port of the script for generating responses, repairing streams, interface code;
  • Mathieu Hervais – homebrew code decrypt_os2, decrypt_sp;
  • SSL / Zerotolerance – reverse encryption capability for decrypted files;
  • zecoxao – decrypt_os2 and decrypt_sp ports on the PC, provision of boards, help in the port of the script for generating responses;
  • Yoti – improvements to decrypt-sp, instructions for creating a service card from a dump, MSID Dumper, PSP-3000 for tests (<3), participation in the Pandora PSP-3000 hack topic;
  • EriKPshat – useful information about JigKick, participation in the Pandora PSP-3000 hack topic, instructions for creating Pandora’s kits, assistance with design;
  • Boryan, lport3, dx3d, stasik007 and many more from the Pandora PSP-3000 hack theme – battery and PSP communication records, communication protocol reverse engineering, hardware schematics for communicating with PSP and much more

Downloads and How to use Baryon Sweeper

Disclaimer: The following is an automated translation from Russian with Google, and might contain errors. Please head over to the original thread at PSPx.ru for details, update, and support.

Creating the Hardware part of the Jigkick battery

For manufacturing, you need a microcircuit with NAND logic elements: K561LA7 / CD7400 or an analogue (option 1) or CD4011 (option 2), a USB to TTL converter (Arduino with closed RESET and GND is suitable), a resistor 1k ohm, 200-300 + ohm resistor, soldering iron / breadboard and probably medium straight arms …

What is USB to TTL Converter?

A USB-TTL converter is defined in the system as a serial port, providing level matching and, in fact, communication with devices using UART (as in our case). It can be executed in similarity to a USB stick or as a cable.

Communication with devices occurs via the RX pins (usually white) and TX (usually green). It is also imperative to connect the ground. To communicate with the PSP, we need to combine 2 wires into 1 – for this we need to make an adapter to a single-wire UART. The diagrams are given below.

An adapter circuit for a single-wire UART (K-Line) and connection to USB-TTL for option 1 (K561LA7, CD7400 and their full analogues)

3.3 – 5V – power supply
Ground – ground
PSP middle contact – single-wire bus going to the middle contact of PSP
Do not forget about the pinout of the microcircuits (arc on the left). Do not forget to connect a 200-300 ohm resistor between the closed lower extreme two legs with the third upper leg from the right.

Adapter circuit for a single-wire UART (K-Line) and connection to USB-TTL for option 2 (CD4200 and its full analogues)

It is performed by analogy with the previous one, with the exception of a slightly different pinout.
If you put everything together correctly, made sure that there is a common ground between the adapter, the console and the computer, preferably everything rang out – try starting a COM terminal (for example, Termite), connecting to a USB-TTL and inserting a pseudo-battery (the preferred way is to use a native battery, isolating the middle contact and placing in its place the wiring from the single-wire bus). If you see packages of type 5A 02 01 A2 – congratulations, you have assembled correctly, you can proceed to the next step.

Creating the JigKick Memory Card

(Note from wololo: this is the “magic” memory stick that will, in combination with the battery emulator, enter to allow service mode)

Below is a google translation of Yoti’s original thread. Details on that can be found at https://www.pspx.ru/forum/showthread.php?t=111101 

Requirements:

  • Memory card of MS PRO Duo standard from 32 MB and higher (MS Micro and MicroSD cards in adapters are also suitable)
  • A workable PSP system of any model with custom firmware for a one-time launch of a self-written program
  • Original battery in service mode (soft-mod/hard mod) or battery with a choice of operating mode
  • Personal or laptop computer running Windows operating system (tested on W10)

Preparation:

  1. Download and unzip to the root of your memory stick archive with the CardDump program
  2. Insert the memory card into a working PSP system and run “CardDump v3.1” in the “Game” menu
  3. When prompted, press the X button to save the card number, and then the O button to exit
  4. Download archive with files “magic” memory card and unpack it somewhere to disk (Note from Wololo: mirror)
  5. Copy the file “msid.bin” 16 bytes from the root of the memory card to the “dec” folder
  6. Run the file “! Encrypt.bat” and wait for the console utility to finish
  7. Delete the files “! Encrypt.bat”, “cygwin1.dll” and “decrypt_sp.exe”

Creation:

  1. Connect the memory card to your computer using PSP and USB cable or card reader
  2. First of all, you need to format the memory card with a partition shift:
    To do this, you need to open a command line on behalf of the Administrator.
    Then we enter the following commands line by line, pressing the Enter button after each.
    Attention! You do not need to enter explanations in brackets, but you need to read and understand!
    1. diskpart
    2. list disk
      (Find the disk number of your card in the first column based on the disk size in the third)
    3. sel disk #
      (Replace the # symbol with the disk number of your card that you just learned before)
    4. clean
    5. create partition primary offset 1024
    6. sel part 1
    7. active
    8. format fs = fat32 quick
    9. assign
      (After entering this command, a window will appear with the contents of your map, naturally empty)
    10. exit
  3. Run the program “rainsipl.exe” from the folder where the downloaded archive was unpacked
  4. Click “File -> Load IPL From File” and select the “ipl.bin” file from the same folder
  5. Make sure the correct letter of your memory card is selected in the “Target Drive” list
  6. Without changing anything in the program, press the big button “Execute Selected”
  7. After the program finishes (after a few seconds), close it
  8. Delete the files “ipl.bin” and “rainsipl.exe”
  9. Copy the folders “ID”, “JIG”, “PRX”, “VSH” and the file “PSPBTCNF.TXT” to the card

Usage:

  1. Insert the prepared memory card into the bricked PSP
  2. Insert the battery in service mode into the bricked PSP
  3. Wait for the schematic inscription “OK” to appear in full screen
  4. Remove the memory card and battery, launch the PSP from the charger
  5. Return the battery to normal mode and format the card

Recovery Process

Connect your USB-TTL converter, which will be connected via a single-wire UART (K-line) adapter to the PSP. Unpack the archive from the attachments and open baryonswp.exe. Make sure the earths of all three links in the chain are tied, otherwise nothing will work! Click on the Start Service button and connect your PSP. The connection will be logged in the Connection Monitor. To start in service mode, specify the serial number FFFFFFFF. If the PSP or COM port gets disconnected when the battery is connected to the PSP, there is probably not enough current. In service mode, wait for the “OK” message in full screen. The recovery process is complete.

PSP Pandora Battery, Baryon Sweeper: What’s Next

It is now theoretically possible to unbrick all PSP Models of motherboards, although this needs to be verified by adventurous testers. Additionally, we can maybe expect that some pre-made versions of the unbricking hardware might come to a store near you.

Source: PSPx.ru, via Zecoxao

The post PSP Release: Baryon Sweeper lets you unbrick PSP 2000/3000, Pandora battery style appeared first on Wololo.net.

Viewing all 349 articles
Browse latest View live